AWARDS
NARI CotY 2020 Winner for Region 5 South Central
Residential Addition Over $250,000
PROJECT GOALS & HOW THEY WERE ACHIEVED
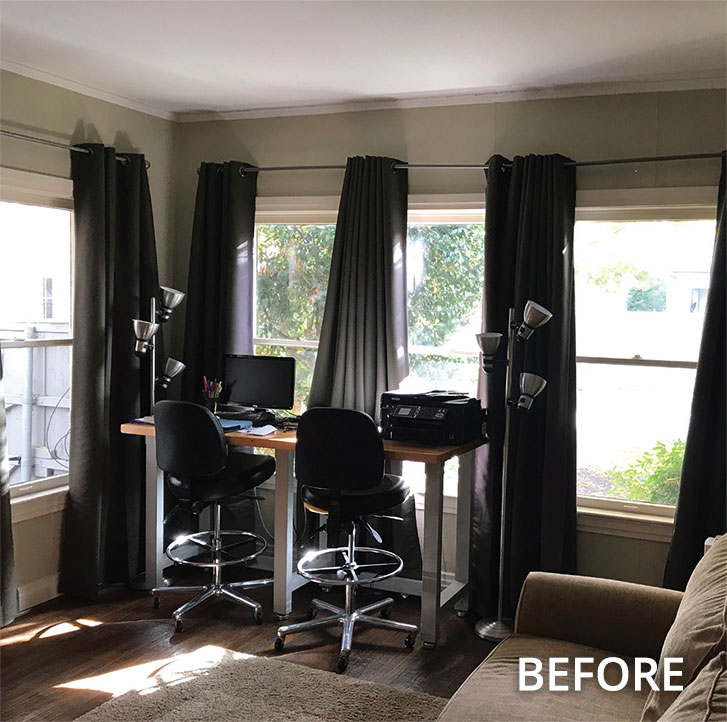
The homeowners of this 1.5-story, Tudor-style cottage house wanted to re-design the existing kitchen, family room, and office to accommodate their family’s lifestyle.
The main goals of the project were to:
- Create open-concept layout
- Update the kitchen finishes and layout
- Add wood-burning fireplace
- Seamlessly blend new construction with existing home
The original floor plan severely separated all three rooms causing the spaces to feel disjointed. To create a more open layout on the first floor, the new design combined the kitchen, family room, and office by completely removing the two dividing walls between the spaces. The plan necessitated a small addition to create the proper flow. A flush wood-burning fireplace was included as part of the 70-square foot addition in order to maximize the floor area.
To ensure the newly remodeled area blended seamlessly with the existing home, neutral finishes with pops of color were utilized and wood flooring was finished to match the hand-scraped wood flooring throughout the entire first floor.


DEMOLITION FLOOR PLAN – FIRST FLOOR


ENHANCING THE EXISTING STRUCTURE’S FUNCTIONALITY
REFLECTED CEILING FLOOR PLAN – FIRST FLOOR

Recessed lighting in the ceiling throughout provides adequate lighting for most daily living. The kitchen contains undercabinet lighting for the expanded counter space, two pendant lights over the custom island, and a pendant over the sink to provide further illumination while cooking or cleaning.
The kitchen finishes were selected to enhance the existing charm of the home. Leathered quartzite countertops and a flat grain walnut island top add texture and warmth to the light and bright color palette. The navy blue island brings a splash of color to the soft and inviting space, while the polished nickel fixtures and hardware highlight the details of the custom cabinetry. The hand-scraped wood floors were finished to blend in with the older part of the home, creating a unified and flowing look that creates the feeling that the new plan has always been there.


Evidence of Superior Craftmanship

After: Island
Where the range originally stood along an existing wall, now sits a bespoke island with a blue, painted base and a walnut, flat grain wood countertop situated below two chic pendant lights with an antique silver finish adding energy and creating a focal point in the kitchen area.

After: Cabinets
Custom details were added to the cabinetry, such as arched toe-kick detail, columns at the corners of the island, and pilasters flank the range and the sink to mimic the columns.

After: Butler’s Pantry
A beaded detail was added to the cabinet doors and drawers elevating the shaker-like style. The doors for the appliance garage are pocket-style. Base molding, window, and door casings were custom matched to the trim profiles of the original home.
After: Mantel
The custom mantel over the fireplace was designed to mimic the details of the kitchen cabinets.
INNOVATIVE USES OF MATERIAL AND METHODS OF CONSTRUCTION USED IN THIS PROJECT
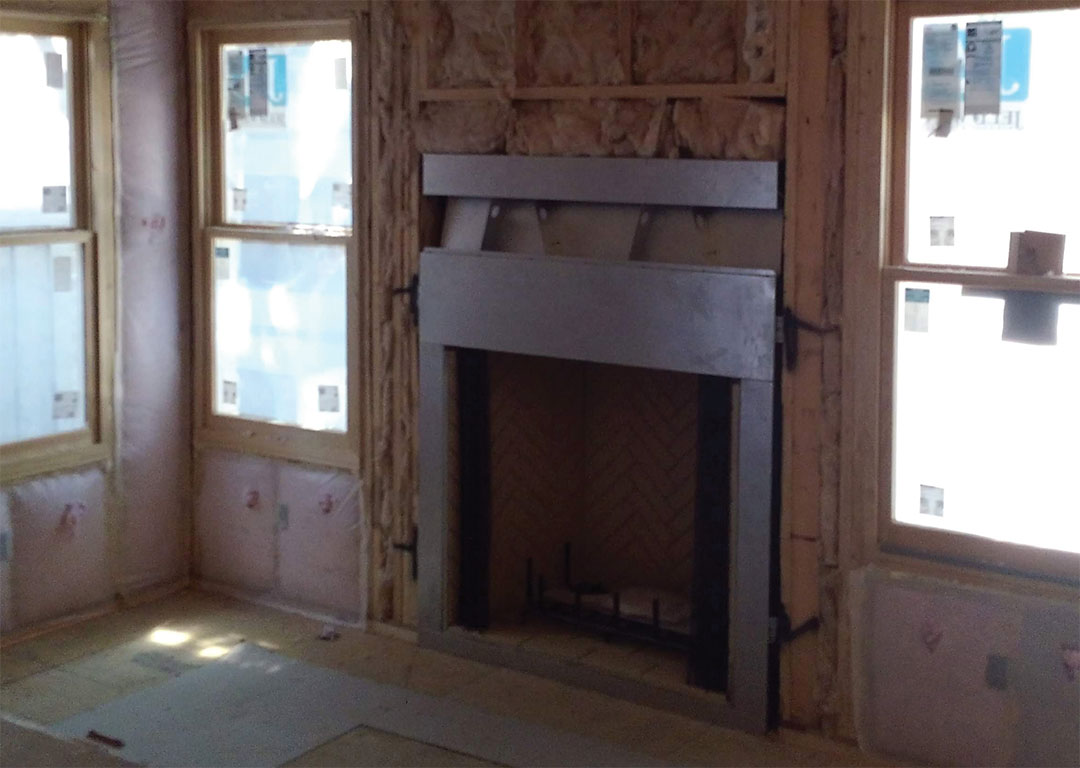
Fireplace Installation
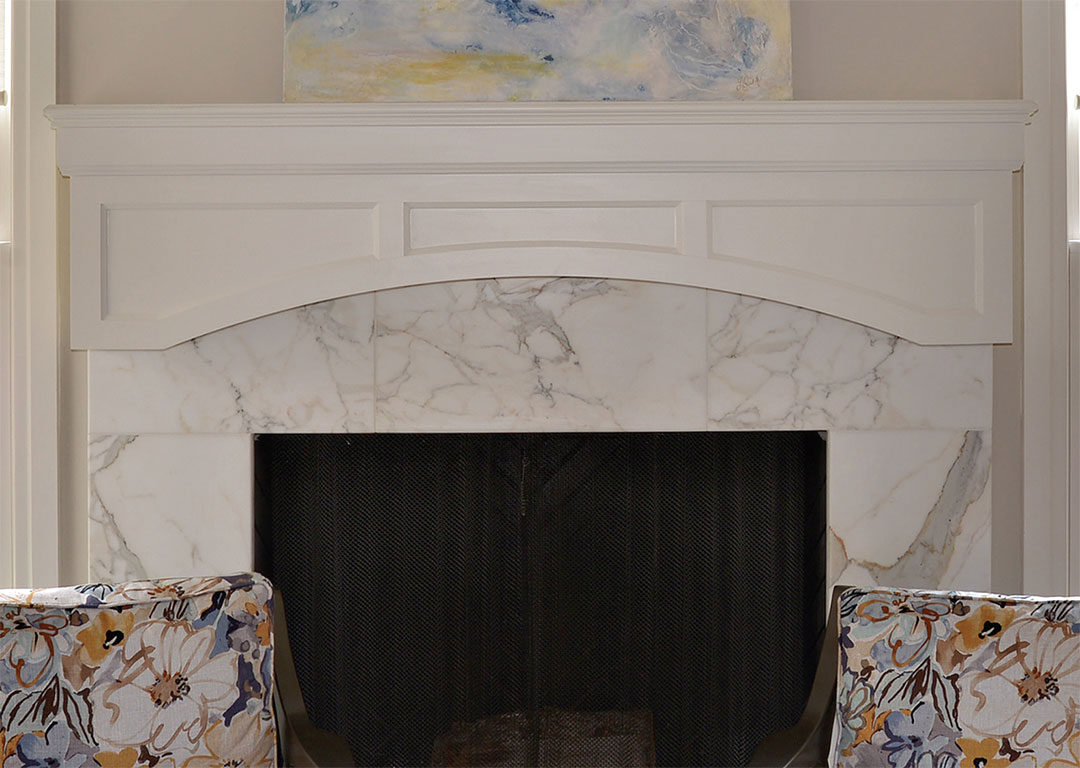
Fireplace Complete
The homeowners had their hearts set on a wood-burning fireplace in the new connected family room, but the traditional method of constructing a fireplace was not feasible within their budget. We sought after and investigated possible solutions to fulfill this wish. Ultimately, we chose a metal firebox with molded masonry panels to mimic the look of traditional firebrick. Due to the lighter weight of this fireplace selection, we were able to minimize the amount of structural concrete piers needed which lowered the overall cost. The molded masonry panels were painted black to make the Calcutta marble surround and the custom mantle the focal point.
Due to the inclusion of the fireplace, we had to remove one existing window causing a reduction of natural light in the space. To remedy this, we added two new windows adjacent to the fireplace.
With the placement of the new windows, the overall size of the custom-matched window casing, and the requirements of the fireplace surround (non-combustible material clearances), we were unable to install a standard wood mantel per the homeowners request. The innovative solution was to design a custom mantel piece that mimicked the custom cabinetry details (i.e. panels, arches, and molding) and met all the necessary fireplace code requirements without window casing interference. Furthermore, we were able to join the mantel with the marble to create a visually cohesive look.
To make the addition blend seamlessly, all wall construction had to be the same thickness (2” x 4”) as the existing home; otherwise, either the interior sheet rock or exterior brick would be out of alignment. Due to the wall thickness, we were unable to accommodate the standard R-19 batt insulation that would achieve the appropriate R-value. Specially ordered batt insulation was installed in the new exterior walls.
OVERCOMING DIFFICULT OBSTACLES
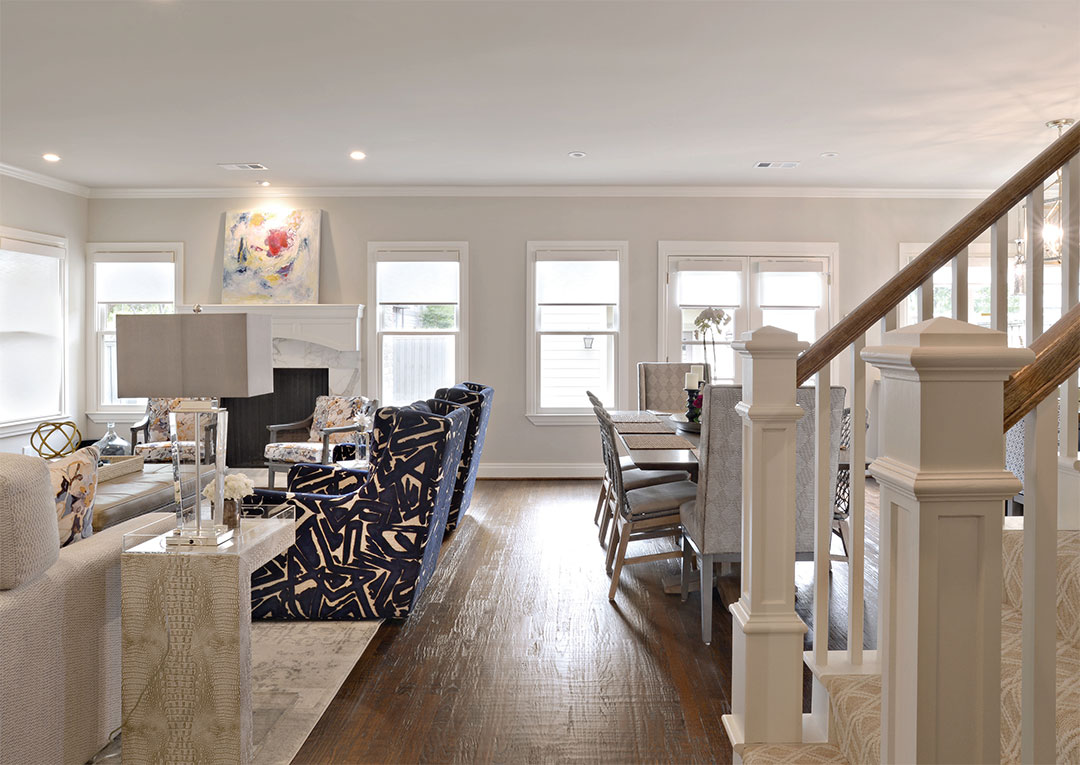
After: Great Room
designed the floor plan with two large cased openings, one in each existing wall dividing the three separate rooms. This
allowed for an improved flow and visibility without having to make any major structural changes. However, as construction
began, it became clear that the homeowners’ lifestyle would be greatly enhanced functionally, and their overall design
aesthetic would be better integrated into the space if the walls were completely removed.
While the space was being redesigned, the homeowners also expressed that they did not want any visible support beams in
the new great room. In order to accomplish this, we had to alter the roofline from hip to gable style in order to fully recess
the support beams into the ceiling.


Before: Hip Roofline

After: Gable Roofline
BEFORE & AFTER PHOTOGRAPHS
Looking for the top-of-the-line remodeling company?
Call award-winning Blackline Renovations. Start a ConversationLook what Dallas homeowners are saying about Blackline!
Proudly Serving the Following
Dallas, Texas Neighborhoods
Bluffview, East White Rock Lake, Farmers Branch/Hockaday, Forest Hills, Highland Park, Hollywood Heights, Lake Highlands, Lower Greenville, North Dallas, North Dallas, Northwest Dallas, Oak Lawn, Preston Hollow, Royal Oaks, University Park, Uptown, West Dallas, West White Rock Lake
Hours:
Monday 9AM–5PM
Tuesday 9AM–5PM
Wednesday 9AM–5PM
Thursday 9AM–5PM
Friday 9AM–5PM
Saturday Closed
Sunday Closed